What Is Blogger
Blogger also is known as Blogspot is a blog publishing platform managed by Google since 2003. It was previously developed by Pyra Labs back in 1999 and then later bought by Google in 2003. It is one of the most promising CMS platforms available on the internet. There are numerous amounts of blogs created every day on blogger and this is the second most popular blogging platform after WordPress. Unlike WordPress, Blogger is a free platform where you can make a beautiful looking blog and you don’t have to spend a single penny unless you buy a domain name. Since the platform is managed by Google, that makes it very special. Because you are getting security and reliability from the internet’s most famous company. Blogger blogs are hosted by Google and generally accessed from a subdomain of blogspot.com. If you want to buy domain rather than having a subdomain, then you can do that too, but there’s no limitation if you are using a subdomain, and you will get every single feature on subdomain too. But its always better to serve from a custom domain owned by the user (like www.example.com) by using DNS facilities to direct a domain to Google’s servers. It will help you in long terms also it looks professional.
Creating a blog on Blogspot is a very easy and 10 minutes job. It is one of the most easiest CMS platforms out there. Anyone including beginner and professional can create a blog on blogger. In simple steps and with no coding knowledge you are going to have a simple yet attracting blog. Blogger has some essential features, it lets you create posts, pages, widgets and other multiple functions in simple steps, it also has drag and drops layout builder, which lets you create and customize your blog. Blogspot is one of the most robust and easy to maintain the platform. You can simply make daily blogs, personal blogs or at the same time, you can run a professional-looking blog and earn money. It doesn’t matter whether you want to create a business blog, portfolio or personal resume, At this time you can get every kind of blogger template for your blog. Since blogger is associated with Google, you get some exclusive features built-in with Blogspot. Features like a simple dashboard, drag and drop layout, easy to edit settings, etc. It allows you to make a blog on anything, it only requires you to have a google account, and if you don’t have any you can create it in minutes. Blogger also supports some of the other Google products built-in, Like adding videos and photos and using google drive products also at the same time you can directly apply for AdSense from the blogger dashboard and you can get a separate option to show ads on your blog. Blogger also supported google plus but now google has shut down the service and it is no longer supported, so now Google has switched back to older google blogger profiles.
Blogger lets you create 100 blogs from a single account, which means you can host 100 different blogs from the same account and publish an article, without switching to any other account or dashboard. It also includes many features from the dashboard directly, like you get options to create a post, pages, sees your traffic stats, manages comments, Adsense settings, layout to adjust and customize gadgets, theme editor to choose/upload theme and edit codes, and settings to manage various things in your blog. Every option has its own individual option and we will get to know about each and every option later in this post. The things which make blogger special is the robustness and easy to understand dashboard. If you are a newbie then you should definitely go with blogger, And if you are a professional then you can also use this platform to create some phenomenal and useful blogs for your various ventures.
Why Blogger Is Beneficial In Comparison Of Other Blogging Platform
Basically the biggest benefit of the blogger is that it is owned by Google and we know in the present time google is the most secure and well-known organization on the internet. At the same time, it makes the blogger compatible with other Google products. So you can use the services very easily. Also, the blogger is totally free, which means you don’t have to pay a single penny to run a blog. You can get plenty of design option, templates, and themes for your blog, here at Gooyaabitemplates we have a huge collection of blogger template for free. Blogspot platform includes basic post editor which looks similar to Wordpad and anyone can start publishing posts in minutes, Being a free platform, you don’t have to worry about hosting and security because everything is handled by google servers. As your blog is hosted on Google servers, it loads super fast and you don’t have to tweak it for faster loading. There are no limits of posts and it doesn’t matter your blog has 1 post or 1 million, the experience will be similar for both the user and the owner. Blogger also has a support forum and community which helps users from time to time if they are facing any type of problem with the platform.
Blogger is beneficial in other ways too, like many popular and well know blogs are still operating on blogger, because of its trustworthy structure and reputation. as we have mentioned above that maintaining a blogger blog is respectively easy instead of other CMS platforms such as WordPress and Tumblr. Certainly, the blogger is very limited but at the same time, it provides so much flexibility. Flexibility in the sense of everything, and when we have said “everything”, indeed it means everything.
Customization is the easiest yet controversial thing in blogger. Blogger lets you customize your existing looking blog into anything with simple CSS and HTML and if you know javascript and jQuery the that will be a cherry on a cake kind of situation. But it only lets you customize in basic manner like you can’t dive more into content management part since everything is hosted on blogger by google and google doesn’t allow anyone to access their data for privacy and security concerns. The simplicity of Blogger does not limit what more established users will accomplish with it, however. Digging deeper into the customization options lets you make a totally unique blog design whereas maintaining the convenience of use that the Blogger backend (the board wherever you design the blog and make posts) provides.
We all know blogger is a product of Google and Google has some other products which directly supports blogger, just like google photos. Since Blogger is integrated with Google Photos, you can actually handle all your images through your Google Photos account. The Insert Image dialog lets you pull an image to the blog directly from one of your Google Photos folders. Conversely, if you upload an image from your computer to your blog, it will be automatically placed in a Google Photos folder. Google Photos also has its own built-in image editing function, which will let you crop, resize and do other edits to an image before you post it to Blogger. Note that if you edit an image with Google Photos after it’s been posted to your blog, the old version of the image on the blog will not show the edits. The image should have to be manually removed in the old version and insert the edited version.
The most beneficial thing about blogger is, inbuilt integration of Adsense and analytics, Since Google Blogger is equipped with different Google tools, like AdSense and Analytics. Users can easily generate a good amount of money through their own Google Blogspot blogs by using a Hosted Google AdSense account. Users can easily sign up for an AdSense account through their dashboard, and then link the advertisements to that blog. Not all blogs might get approval for advertisements, so users should double-check the eligibility checklist of google terms and policy. Users can also view detailed information about their blog’s audience by using Google’s data analytics platform, Google Analytics. Though blogger has its own statistic dashboard sometimes it shows incorrect reports, so we recommend you to use Google analytics. These services make blogger special and different from other CMS platforms. Maybe it lacks features in some cases but still has the best value for what its worth. As people say Blogger is easy to set up and use, so it’s great for first-time bloggers. But It doesn’t mean that it lacks some basic and useful features that a professional will need.
As above we have seen the history and importance of the blogger also the benefits of the platform. Blogger also contains some great features that we haven’t mentioned in detail. Like previously blogger has some additional widgets by the official team and also the third party but later blogger removed all the third party widgets and made 27 default widgets that are accessible from the layout. You can add features and function through those widgets. It also includes Adsense widget by default if you have a hosted account and if you have non hosted account then you can add ad codes in HTML/javascript widget.
How To Start A Blog On Blogspot?
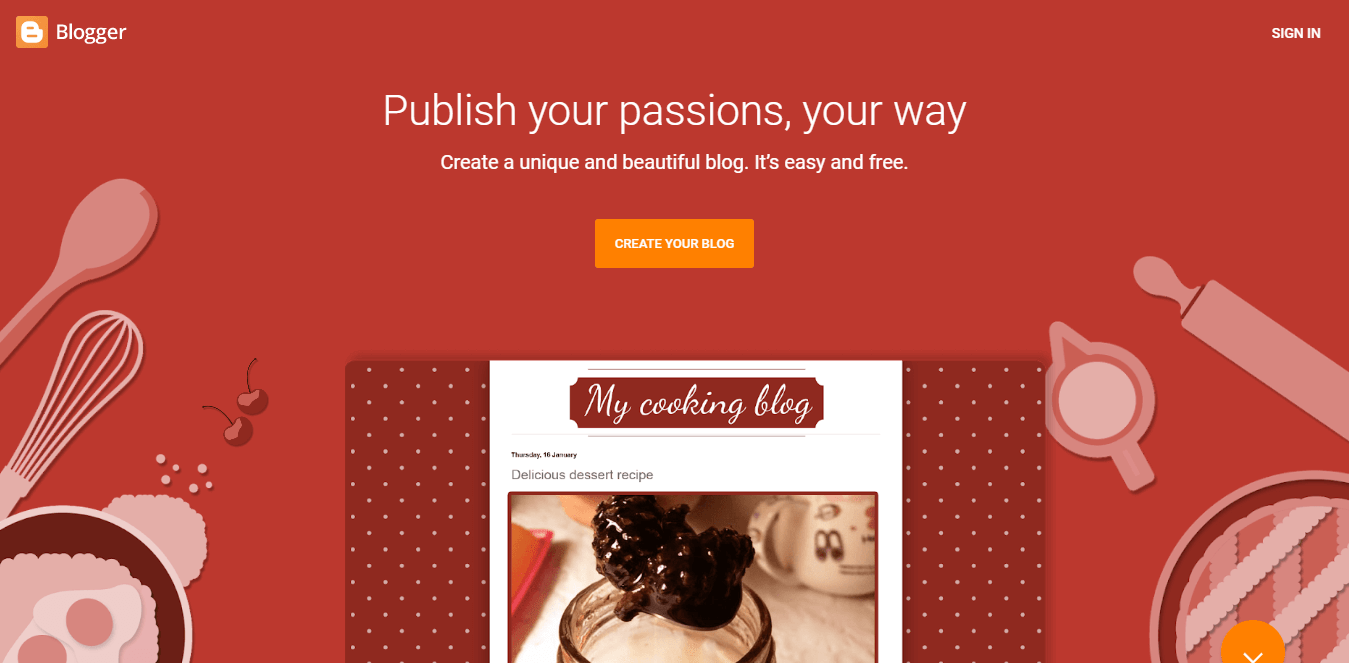
Starting a Blog on Blogspot platform is very easy, you don’t have to do a load of work, you just need a google account and you are good to go. If you don’t have a google account then you can create it any time, it takes only 2 minutes. After successfully creating a google account, you can sign in to your blogger account directly visiting blogger.com and clicking the sign-in button. If you are creating your first blog then it will show a button “Create a Blog” otherwise you can create a blog from the menu available on the left side and clicking the dropdown arrow, after clicking that, a “New Blog” option will appear along with your existing blogs. You can click that to create your new blog. then you have to enter your blog title, blog address and you have to choose a theme for your blog. There are various themes available also in 2017 blogger introduced some new theme with new generation codes and structures. These themes are more flexible and robust. After selecting the theme you can directly see your blog by visiting your blog’s address. You will get a specific dashboard for your every blog you can customize post, pages, check stats, apply for Adsense, moderate comments, edit the theme and customize it. In addition, you also get various setting options which we have already discussed above and will going to discuss briefly in this article. Now that we have discussed the method to create a blog on blogger, let’s go ahead and see the step by step tutorial on creating a blog on blogger.
Create a Blog
- Sign in to Blogger.
 2. Click Create New Blog or On the left, click the Down arrow Down Arrow.3. Click the New Blog.
4. Enter a Name for Your Blog.
5. Choose a Blog Address or URL.
6. Choose a Template.7. Click Create Blog.
 2. Click Create New Blog or On the left, click the Down arrow Down Arrow.
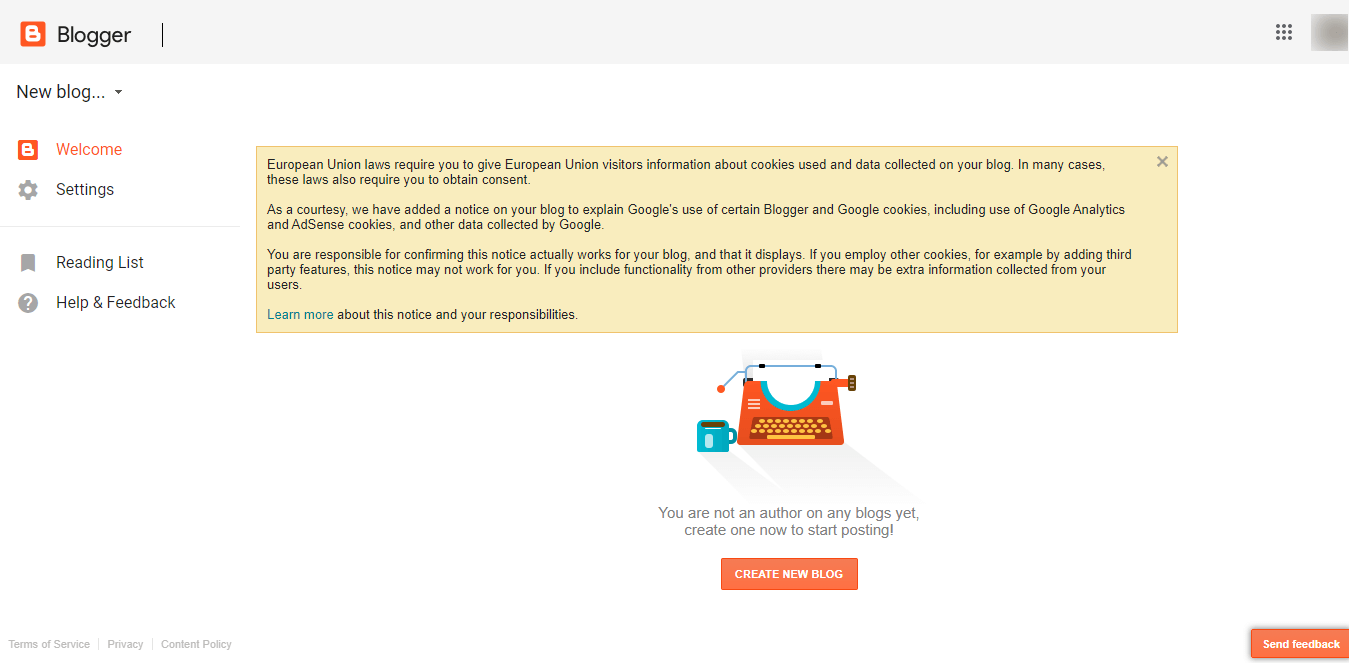 3. Click the New Blog.
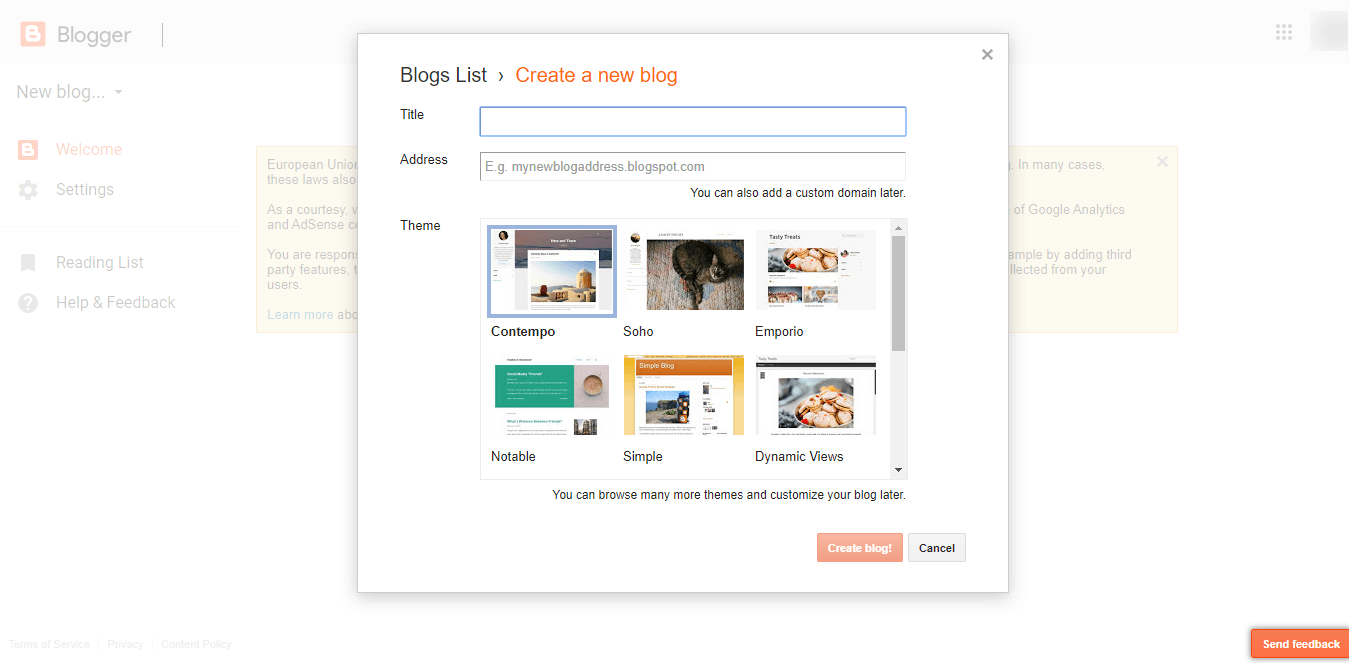 7. Click Create Blog.
Setting Up Your Blog
Now that you have learned, how to create a blog on Blogspot, so let’s move ahead see, what options you will get after creating a blog. After creating a blog your blog dashboard will look like the below image.
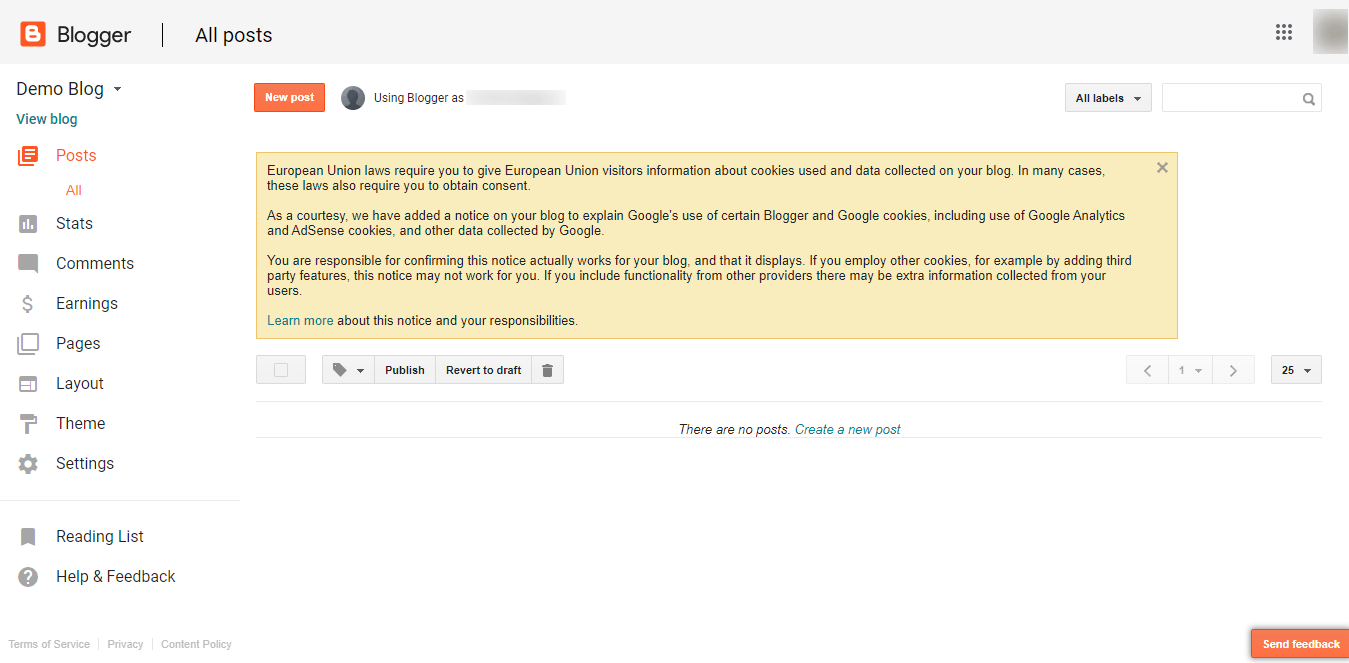 As you can see above, you are getting several options in the left-hand side of the screen, there are mainly 8 options available, which you will need to manage your blog properly, those options are –
1. Posts
2. Stats
3. Comments
4. Earnings
5. Pages
6. Layout
7. Theme
8. Settings
1. Post
Post options have three separate options, those are published, draft and all, where a published section has all the posts which you have written and published in the blog, the second one is draft where the unpublished or unfinished posts are stored, and the last one is all where both of the post types are stored.
To create a new post you have to click “New Post” (Orange Button) That will open the blogger’s post editor, this post editor looks similar to windows Wordpad and works the same. It is divided into two sections, the first one is composed and the other is HTML. Just like the name, compose is for normal text and is more like a visual editor, whereas the HTML section is more advanced and professional, where you can format your posts with HTML codes, and you can also add tables, Iframes and much other third-party stuff with that. You also get various options to format your written post. You get basic stuff like bold, italic, strikethrough, underline and advance stuff like adding images, media, codes, etc. All of these options are available above the post text area. On the right-hand side, you can see other options that are related to post publishing. You can add labels, enable or disable comments, changing the permalink, schedule a post for future, add location related to you or your blog posts. While writing a post, you can also check a live preview without making the post live and inspect about errors and mistakes. There are many more options which you can see by checking the image below image.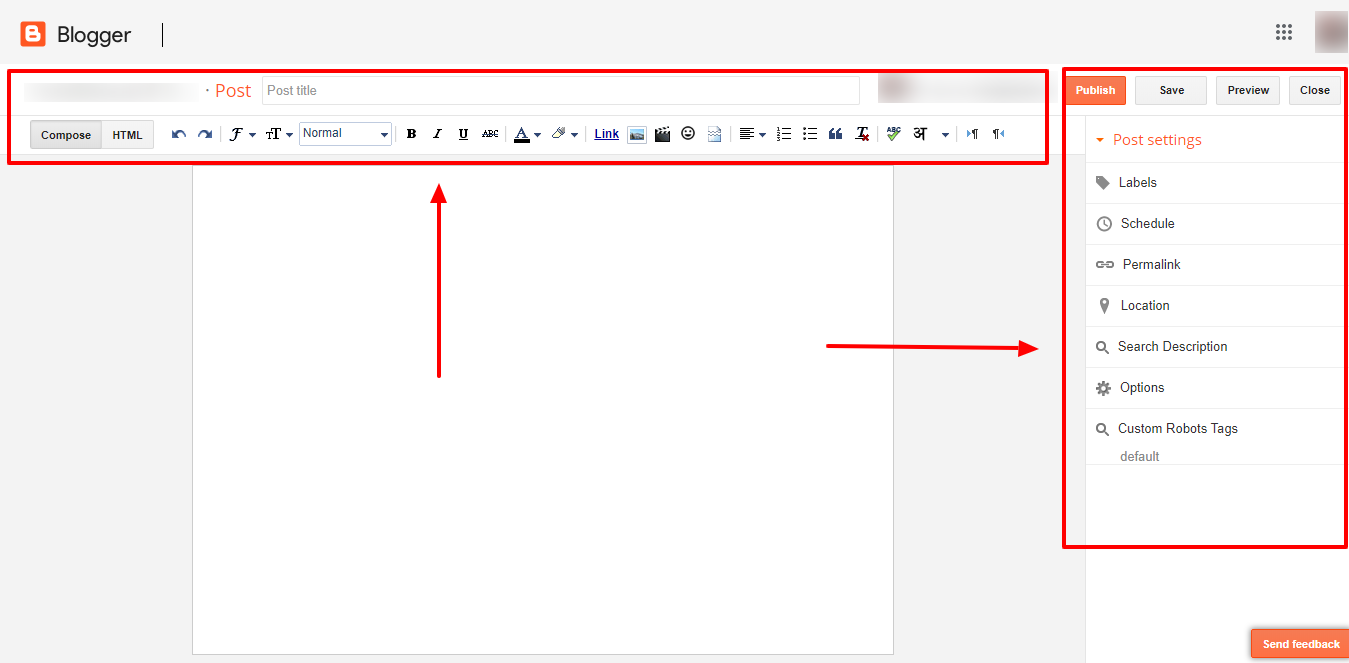 As you can see in the above image, we have marked the options in red boxes and pointed out several options. To access these options just follow this tutorial. Access your blog Posts > click Edit on any of your posts or add a new post. then select any text you want to customize and click on the options available above your post editor. Starting from the left you get options for undo and redo, which you can use to correct your mistakes while writing a post. Then comes the font styling section, where you get the option to change the font, edit text size, adding headers, bold, italic, underline, strikethrough, text color, text background, and making a normal text to any link text. After that, you get options to add media, whether you want to add images, video, and emoticons you can easily add them through those options. Then you get a text formation option, the first option you get is to add read more or page break, which creates a small summary of your big post for home and archive pages. Then comes text alignment, adding number bullets or symbol bullets, followed by blockquote, remove text formatting and language-related options.
Now that we have understood the process to create a post, let’s move ahead and what other features you are getting in your blogger dashboard.
2. Stats
This section of the dashboard contains your blog details related to views and hits. Basically it shows how much traffic you are getting and what are your visitor statistics. When you click the stats button on the left-hand side menu, several options will appear on the right-hand side of the page, which shows the traffic statistics for your entire blog for a day, yesterday, week, month, last month, year and all time. Also, it shows the most viewed posts, traffic source, keyword, etc. You can also check other things like it also shows the similar values for pages and other links, you can also see the number of comments appearing on your posts, but one thing you should consider before relying on this statistics that blogger stats are incorrect usually it shows multiplied values, that means if a visitors see your site onetime, then it will register the view count three times, This issue is strange and hopefully, it will be fixed in the upcoming update.
3. Comments
Comments are something that boost’s and makes your blog weak at the same time. A visitor, reader or blog follower also including blog author and admin has the facility to leave a comment. Which lets everyone easily connect and interact with each other. Basically Blogspot includes a separate section for comment management and its settings. While to moderate comments you can check the comments tab in the left side menu, to change the settings, you have to visit the main settings section in which you will find The Posts and Comments settings, which will help you reduce spam on your blog.
Comments are something that boost’s and makes your blog weak at the same time. A visitor, reader or blog follower also including blog author and admin has the facility to leave a comment. Which lets everyone easily connect and interact with each other. Basically Blogspot includes a separate section for comment management and its settings. While to moderate comments you can check the comments tab on the left side menu, to change the settings, you have to visit the main settings section in which you will find The Posts and Comments settings, which will help you reduce spam on your blog. One of the most trusted ways to reduce spam. is to set out, who can add a comment on your blog. From the Posts and Comments section, select an option from the Who Can Comment options.
a) Anyone: This option in the settings, allows the as many as possible audience, with no restriction on who can add a comment. It adds and shows no spam prevention, but it also imposes no barriers to leaving a comment to genuine commenters.
b) Registered Users: It sets your blog settings to accept comments only from registered blog members. So that it becomes easy for you to cut down on some spam. But you shouldn’t forget that not everyone has a Blogger account or wants one so you might lose some real comments from your loyal readers or viewers.
c) Users with Google Accounts: As per security, we can definitely trust on google, as we know Google validates the accounts it creates, letting users comment on your blog who have Google accounts can help you to ensure that you get comments from trusted sources like humans rather than spammers.
d) Only Members of the Blog: This option is the most strict one and it prevents anyone who isn’t a member of your blog from leaving a comment on your blog. It restricts the option for commenting on your blog and no one, whom you haven’t personally authorized as a member can leave a comment. Now by activating this setting it will make you busy with comment moderation and this option creates a lot of work for you because you have to maintain the list of authorized members, but on the other hand, you don’t get any spam. Now you must be wondering, how to activate this option but it is very simple and you can add members to your blog from the Basic Settings page and they can comment on your blog post very freely.
If you are new on blogger then you should know that on the Posts and Comments page, you can change your comment moderation options. You can change the Enable Comment Moderation setting to Always. If you turn on the comment moderation, it will prevent anyone from posting a comment that you haven’t approved.
When someone leaves a comment on your blog, you get an email that informs you about the comment on your blog. Also from the blogger dashboard, you can select or reject the publication of the comment. Comment Moderation can be done via e-mail also.
See if you ask us then we will say that Moderating comments is a lot of hard work for you, but it will improve the quality and readability of comments on your blog for your readers and the content, and it also discourages those spammers in the future, whose comments annoy you the most. At the same time, Commenting has a downside: intelligent Spammers have found the new commenting technology, as well. Just as with email, you can expect some blog commenters to tell you about fabulous tips and tricks, opportunities, medicals & pharmaceuticals, and other less-than-savory possibilities information neither you nor your readers want.
4. Earnings
Earning is perhaps everyone’s dream. And to try and do that, Google Adsense is one amongst the most effective to earn revenue directly from our own journal, It’s work as PPC, or Pay Per Click wherever you place ads in your web site and once you get clicks on that, then the cash is coming back to your account. these days we tend to some tips wherever you’ll study however you’ll generate additional revenue from your Adsense and earn bulks of cash directly from your journal.
Google Adsense is usually a program in which often enterprises can present advertisements via google on Web sites and earn profits from hits that generate traffic for the Google search engines. Google AdSense represents businesses coming from all sizes worldwide inside multiple languages. AdSense is some sort of refinement and expansion in the concept behind hysterical -ad sharing arrangements that have been in use for years. If you seek to break it the earning everything you made will likely be swallowed by google then you definitely should look your mind in the mirror and feel about the amount you meant to lose yourself. Adsense is an integral part of the Blogspot ecosystem.
Google Adsense is amongst the easiest and best ways to generate online earnings. You might ask how can these Adsense functions? Google Adsense is definitely an ad portion. program running by google and just about anyone can participate as long as you have a web page or blog or perhaps youtube channel and including email via Gmail. It sounds good “EMAIL by GMAIL” suitable. Yes along with also not necessarily at all breaking with Google Adsense terms connected with service.
It is the simplest way to monetize your blog, your youtube channel and get paid for the effort. I’ve tried other advertisers similar to Bidvertiser, Clicksor, and Infolinks but do not require equals to google in terms of publisher’s earnings. It’s a well-known fact. And it is definitely recommended.
Website or blog or youtube channel owners will use this program to make it possible for text, image or video ads on their youtube channel or perhaps website or blog. This includes mobile sites as well but Adsense for mobile is not yet available using some countries. But I stumbled on knowing it’s getting now and surely I most certainly will post a link here about ads on cellular devices clearly.
Nowadays Google AdSense is making its Terms and conditions much more strict for publishers, so many peoples get disapproved by the Google Adsense team. Many bloggers also leave blogging because they didn’t get approval from the Google AdSense program. As Google AdSense program is one of the best ad networks available on the Internet and also it pays much more than many other ad networks. So, let’s move and here in this article, we’ll focus on the things which you have to do to get approval from Google AdSense for your blog. Steps to follow:-
a) Read Privacy Policy & TOS: When we are talking about Google Adsense then the privacy policy page and terms of services pages come first. You have to first read the Privacy Policy and TOS (Terms and conditions) carefully so you can be sure that you are not violating any rules of Google. Many peoples didn’t read these and even after getting approval they lost their account due to violation of rules. It is one of the important tasks to check these on a weekly basis because they can change anytime. You should have a text like ‘You can read Privacy Policy here and TOS here’.
b) Copyrighted Contents: Don’t copy any content from any other website, because Google is strictly against plagiarism. Also always remember that images available on Google Image search are the property of any other website owner so if you use those images without permission than again that will be counted as copied content. Many peoples did this mistake, even I was doing it when I was new in blogging. Also, I saw many peoples copy codes of tool, widget, etc. and share that without any permission, so these also count as copied content, however, there are some codes which can be shared without any permission, so these also count as copied content, however, there are some codes which can be shared without any permission. Images, articles, codes, etc. can be copyrighted so before posting these of anyone take permission from its owner or from where you found it. Another thing I saw is many peoples copy the whole article of peoples and give credit and think now they will not get any problem, while it is also counted as a violation of copyright until you get permission from the actual owner.
c) Content and Quality: You have to write a good amount of articles, like nearly 35+ and then you may apply for Google AdSense. Also try to post contents that cannot be found on any other blog or website, like what I was doing to get my site approved. Otherwise, you may get a reply as ‘Site does not comply with Google policies’. Also, try to write at least 300+ words articles and also do daily posting to make sure that your blog is alive, otherwise, they may think that you have created your blog only because to get Google AdSense account.
d) Site age: As of Google AdSense policies sites from countries such as India, China, Pakistan, etc. have to wait till their site gets 6 months old, not a domain. However some sites get approval before that time, if they have a good blog and good content, my blog Tricky Techs were also got approval within 35 days. So, this is not correct that everyone has to wait 6 months, you simply need to create high-quality content, as it is most important. Also, I recommend that you didn’t blog to get approval from Google AdSense, instead of doing blogging to get your blog into a success.
e) Don’t post out of blog-niche articles: Yes, if you do out of blog-niche posting than you can’t get approval because it is important for the AdSense crawlers and approval team to understand what your blog is about. If they found multi-niche articles on the same blog then they can’t display relevant ads so simply, your application will be rejected. Also, even after getting approval it is not a good idea to post out of niche articles because that will lower you’re earning a lot.
f) No illegal content: I know many of you already know this but this is for those who don’t know about it. Using or sharing any illegal content on your site result as a disapproval message, so simply don’t use any because they may permanently ban your site or email too. Even if you are Blogger than you may also lose your whole blog for violating Blogger TOS.
g) Traffic: It is not much important much a little, because crawlers have to get notified that the site is using Google AdSense ad code and after it, they can continue the process. And also I think you may need at least 80+ daily page views to get approval, and it is not a big requirement. Also, if you didn’t get much traffic then you can’t also earn a lot of money, so applying after getting a good number of visits is a good idea. So, these were the tips that you can follow to get approval from Google AdSense for your website. Do remember that don’t apply again and again in just a few times, wait for at least a week and do some most changes on your blog which makes that much better and then apply. Also, I saw some peoples always say you that Google AdSense doesn’t need your website, your blog niche is now days too common and there are thousands of others in the same niche so you can’t get approval, etc. so if anyone says your words like this then don’t stop trying. Believe yourself, not others. Before adding ads on your blog you must link your AdSense account to your Blogger account and to do that, you must have an AdSense account or you should have registered any. Adsense is a little different than any other Google services, as it isn’t one that comes automatically with registering for a google account. To do so just follow this below step.
Go to www.google.com/adsense/start
You should know one thing, registering for AdSense isn’t an immediate process, it takes time. AdSense ads will start displaying on your blog as soon as you register the application and link the accounts. You should know one thing, registering for AdSense isn’t an immediate process, it takes time. AdSense ads will start displaying on your blog as soon as you register the application and link the accounts, after getting approved the ads will show up on your website, if you are having a new account and ads aren’t showing on your website then don’t worry because sometimes google doesn’t have anything to show then they display blank space instead of ads, once your website is old enough and if it is getting good amount of traffic then this issue will not happen much. If you are having a hosted account that means if you have applied for AdSense directly from the blogger dashboard, then on your dashboard you can see various options related to AdSense in the earnings tab.
Here is how you can sign up for AdSense to show ads
1. Sign in to Blogger.
2. At the top, click the Down arrow.
3. Click the blog you want to run ads on.
4. In the left menu, click Earnings and then Sign up for AdSense. If you don’t find the button, check the AdSense eligibility requirements to find out why you might not qualify for AdSense.
5. Choose the Google email associated with your Blogger account.
6. Fill out AdSense form and then create an account.
7. Enter AdSense payment details.
8. Verify your phone number and then click Submit.
9. The system should automatically take you to Blogger to finish the process.
10. If you don’t land in Blogger, click Redirect.
11. If you’re interrupted before you click Redirect, or if you find the message: “we’re working on setting you up” on your AdSense
homepage for more than a few days:
a) Go through steps 1-5 again.
b) Click Accept association.
Here is how you can show ads between your posts
1. Sign in to Blogger.
2. In the top left, click the Down arrow.
3. Click the blog you want to show ads on.
4. In the left menu, click Layout.
5. Depending on your template:
6. In “Blog Posts” under “Page Body,” click Edit.
7. In “Blog Posts” under “Main,” click Edit.
8. In the window that appears, check the box next to “Show Ads Between Posts.”
9. Choose the ad format, colors, and how often the ads should appear.
10. Click Save.
Here is how you can show ads in the columns
1. Sign in to Blogger.
2. In the left menu, click Layout.
3. Click Add a Gadget.
4. Select the AdSense gadget and click Add
5. Configure AdSense and click Save.
6. In the top right, click Save arrangement.
You can also show ads from other services instead of AdSense and for that, you need to get codes from the ad provider. Here you can show ads from other ad services
1. Sign in to Blogger.
2. In the top left, click the Down arrow.
3. Click the blog you want to show ads on.
4. In the left menu, click Layout.
5. In the area where you want to place the ads, click Add a gadget.
6. In the window that appears, under “Basics,” find HTML/Javascript and click Add Add.
7. Enter a title (optional).
8. Copy and paste the code from the ad service website into the content section.
9. Click Save.
Well after adding AdSense you can check your earnings from the AdSense dashboard, to check the earning stats and see your Blogger earnings report.
1. Sign in to Blogger.
2. Click the blog you want to see a report for.
3. Click Earnings.
4. Click Visit AdSense for details of my earnings.
After adding Adsense if ads are not appearing or showing here is a solution to check and see what to do if AdSense isn’t turning on.
1. Sign-in to the blogger dashboard.
2. In the top left, click the Down arrow.
3. On the Blogger dashboard, click the blog you want to put AdSense ads on.
4. In the left menu, select Layout.
5. Under the AdSense gadget, click Edit.
6. Click Save.
7. Repeat Steps 4 and 5 for every AdSense gadget on your blog.
8. At the bottom of your “Blog Posts” gadget, click Edit.
9. Click Save.
10 In the top right, click Save arrangement.
11. To check that your account is still active, go to AdSense.
Now that you have got to know about AdSense and everything about it, it is very important to know about ads.txt file, google has made it mandatory to add ads.txt file in the blog.
Here is how you can Set up an ads.txt file
If your blog is monetized with third-party providers or you’ve manually integrated AdSense in your blog, you will need to manually set up the content of the ads.txt file.
1. Sign in to Blogger.
2. In the top left, click the Down arrow.
3. Click the blog you want to set up an ads.txt file on.
4. On the left, click Settings.
5. Under “Settings,” click Search preferences.
6. Under “Monetization,” find “Custom ads.txt” and click Edit.
7. Click Yes.
8. the settings from your third-party monetization provider and paste them in the text box.
9. Click Save Settings.
10. Optional: To check the content of your ads.txt file, go to http://<your blog address>/ads.txt.
Note: If your blog is not monetized, or it’s only configured to use AdSense using the Blogger-AdSense integration, then you do not need to manually set up ads.txt. Blogger will do this for you.
So we hope that you got everything related to blogger and its AdSense dashboard, The blogger helps immensely in terms of Adsense and its approval if you are having a blog on blogger.
5. Pages
Pages are something different than normal posts, there is a limit of creating pages, which is 20. It is available to create important pages such as “About” or “Contact” or “Terms and Condition” or “Sitemap” or “Policy” and many more. This option is available to create consistent pages, You can show the pages on pages widget that can be added through the layout.
Note: You cannot use specific posts as pages.
Here is how you can show your pages
1. Sign in to Blogger.
2. In the top left, click the Down arrow.
3. Select the blog to update.
4. In the left menu, click Layout.
5. In the section you want your pages to show, click Add a Gadget.
6. In the window, next to “Pages”, click Add.
7. Set your settings and click Save.
8. At the top right, click Save arrangement.
To change where your pages will appear, drag the gadget to its new location.
Here is how you can create, edit, or delete pages
1. Sign in to Blogger.
2. In the top left, click the Down arrow.
3. Select the blog to update.
4. On the left menu, click Pages.
– Create a new page: Click the New page. Enter a page title and other information and click Save, Preview, or Publish.
– Edit a page: Under the page, you want to edit, click Edit. Update your page and click Save, Preview, or Publish.
– Delete a page: Under the page, you want to remove, click Delete and then Ok.
You can add your blog pages in the widget or else you can connect external links through that widget, it is simple and easy to do the process. Everything can be done via your layout, which can be accessed through the blogger dashboard.
Here is how you can create a link to another website
1 Sign in to Blogger.
2. In the top left, click the Down arrow.
3. Select the blog to update.
4. In the left menu, click Layout.
5. In the “Pages” section, click Edit Edit.
6. Under “Pages to show,” click + Add external link.
7. Enter the page title and URL and click Save Link.
Or else you can select your pages to show into the widget with some minor selections or drag and drops it can be done.
Here is how you can select the pages to show
1. In the left menu, click Layout.
2. In the “Pages” section, click Edit Edit.
3. Select the pages you wish to show.
4. Click Save.
5. At the top right.
6. Click Save arrangement.
6. Layout
The layout is a feature that helps you design your desired look for your blog, You can change your blog’s layout, color scheme, and more. You can use gadgets to do things like display your blog’s archive, show blog labels in a list on every page or put your profile on every page.
To add a gadget into your blog, follow these below steps.
1. Sign in to Blogger.
2. Choose the blog to update.
3. In the left menu, click Layout.
4. In the area where you want to add something, click Add a Gadget.
5. In the window that opens, choose the gadget to add and click Add Add.
6. In the lower-left, click Save.
7. Optional: To change the settings on a gadget, click Edit.
Layout option varies upon different themes, like blogger’s default themes have different kind of layout and custom themes have a different layout. Layout option varies upon different themes, like blogger’s default themes have different kind of layout and custom themes have different layout, as you know blogger is not that flexible platform in terms of giving features or customizations, In this case, modern-day developers like SoraTemplates, TemplatesYard, and way2themes, are trying very hard to provide as much options in the layout area, Previously it was very difficult to change option and settings of the theme but now it can be done in simple steps and easily accessible through layout.
7. Theme
Unlike the Layout area, the Theme option is very different, it helps you to do advance customization, change the look and feel of the blog design, or you can entirely change the design of the blog by shifting to another theme. People can see and interact with your blog in different ways by using one of Blogger’s themes. or they can use custom themes available in our directory.
a) How To choose the blogger’s default theme.
1. Sign in to Blogger.
2. In the top left, click the Down arrow.
3. Click a blog to update.
4. On the left menu, click Theme.
5. Click the theme you want to use.
6. In the bottom right, click Apply to Blog.
7. Optional: To save a copy of your theme, in the top right, click Backup/Restore and then Download theme.
There is one more option for themes which is Dynamic views, you can use the setup of the dynamic view for your blog, When you’re using a Dynamic Views theme, Blogger will record each post displayed as a pageview and your readers will have the option to change their default view or stay in the dynamic view. If you want to use this function then make sure that sharing is turned on for your blog.
If you are using blogger’s official templates then you will miss a lot of modern-day functions like, fast loading, responsiveness, SEO optimization and many more, but at the same time you get some native features which let you use the blogger template customizer, as blogger comes with blogger template customizer and their official themes supports that functionality, you can customize blog width, background, sidebar width, post width, font size, color, font type and many more, lots of new day blogger templates also supports this functionality and lets you use the blogger template customizer in most prominent way.
To Change the background, column widths, and more, follow this below process
1. Sign in to Blogger.
2. In the top left, click the Down arrow.
3. Click a blog to update.
4. On the left menu, click Theme.
5. Under “Live on Blog,” click Customize.
6. Use the left menu to customize your background image or color and to adjust widths, layout, and other settings.
7. In the top right corner, click Apply to Blog to make your changes live.
You can also change the font, font color, and font size for your entire blog by following below steps
1. Sign in to Blogger.
2. In the top left, click the Down arrow.
3. Click a blog to update.
4. On the left menu, click Theme.
5. Click Customize.
6. In the top left corner, click Advanced.
7. Choose the font, font size, and font color you want for each kind of text you want to use. For instance, you can change the
formatting for the regular blog post text or for the page headers.
8. In the top right, click Apply to Blog.
If you don’t want to use blogger’s default set of theme and want to give your blog a fresh and professional look then you can install custom blogger templates, you can’t find them in your dashboard and installing them is quite different from installing a default theme, you need to first choose your theme and download it from the theme creator’s website or you can check our huge directory, we are the best blogger template provider in the world. We have a collection of thousands of blogger templates related to various categories. It includes categories like Responsive, Seo Friendly, Ads Ready, Slideshow, Social Bookmark Ready, Drop Down Menu, Vertical Drop Down Menu, Email Subscription Widget, Post Thumbnails, Breadcrumbs Navigation, Tabbed Widget, Page Navigation, Footer Column, Sidebars, Fast Loading, Instagram Ready, Browser Compatibility, WhatsApp Sharing, Google, AMP, Magazine, Minimalist, Portfolio, Simple, Clean, Modern, Elegant, WordPress Themes Looks, Gallery, 3D Style, Stylish, Movie, Anime, News, Photography, Culture, Personal Pages, Music, Video, Business, Fashion, Games, Blogger, 1 Colum, 2 Columns, 3 Columns, 4 Columns. Also at the same time, you get various color options fr various blogger templates like Black, Blue, Brown, Gray, Green, Orange, Red, White, Violet, Yellow, Silver, Pink. If you are using a personal blogging theme then these themes can be used to create blogs like travel, adventure, OOTD, Fashion, Lifestyle, Personal blog, Diary Entry kind of blogs. On the other hand, if you are using magazine blogger template is ideal for any news or magazine website but specially built for tech, blog magazine, newspaper, viral blogs, authority blogging, niche blogging, etc but also ideal for review, movie, howTo, sports, niche, authority, schools, institutions, etc.
So if you are using default blogger template then its very simple to switch from one to another but if you want to give your blog a professional look and want to use advanced options such as extra columns and sidebars, responsiveness, fast loading, SEO optimized, extra ad spaces, advance widgets, featured posts, recent posts, sliders, social widgets, random widget, advance menu, stylish design, and many more thing then it is better to use custom blogger templates, you can get them from our directory, we at Gooyaabi Templates have a huge collection of blogger themes. Installing these themes is very simple and easy it is almost identical as installing the default blogger theme, except you have to install the file externally or manually. Here is a tutorial to install custom blogger theme.
How To Install Blogger Template
Installing a blogger template on your blogger blog is very easy. Gooyaabi Templates gives you thousands of free blogger templates for renovating your blog. Yes! We giving new look for a blogger blog. This tutorial shows you how to install/upload a new blogger template. We cover two types of installing method with step by step guidance.
Method-1: Uploading .xml file. Your existing widgets will keep on blogger and you need to remove manually on this method
Method-2: Copy and paste coding. Completely replaced all coding. (If you have an error when uploading template using method-1, then try method-2)
First, we going to method-1 which is uploading .xml file.